If you’ve ever tried to learn photography, you’ve probably come across the term aperture. It’s one of the three pillars of the exposure triangle (alongside shutter speed and ISO), but for many beginners, it can feel abstract or overly technical. The good news? Aperture is actually quite intuitive once you break it down.
Let’s explore what aperture is, how it works, and how you can use it creatively to improve your photos.
What Is Aperture?
Aperture refers to the opening inside your camera lens that allows light to pass through and reach the sensor. Think of it like the pupil in your eye: it expands in low light to let more light in and contracts in bright conditions to reduce light intake.
In photography, aperture is measured in f-stops, written as f/1.8, f/4, f/11, and so on.
Understanding F-Stops (The “Confusing” Part)
Here’s where many people get tripped up:
- Smaller f-number (e.g., f/1.8) = larger opening = more light
- Larger f-number (e.g., f/16) = smaller opening = less light
It might seem backward at first, but once you remember this relationship, it becomes second nature.
Aperture and Exposure
Aperture directly affects how bright or dark your image is:
- A wide aperture (low f-number like f/2.8) lets in more light → brighter image
- A narrow aperture (high f-number like f/11) lets in less light → darker image
This is especially useful in tricky lighting conditions. Shooting in low light? Open up your aperture. Shooting in bright sunlight? Stop it down.
Aperture and Depth of Field
Beyond brightness, aperture has a powerful creative effect: depth of field.
Depth of field refers to how much of your image is in focus from front to back.
- Wide aperture (f/1.8 – f/2.8):
- Shallow depth of field
- Subject is sharp, background is blurred
- Great for portraits
- Narrow aperture (f/8 – f/16):
- Deep depth of field
- More of the scene is in focus
- Ideal for landscapes
This is how photographers achieve that soft, blurry background look (often called bokeh).
When to Use Different Apertures
Here are some practical scenarios:
Portrait Photography – Use a wide aperture (e.g., f/1.8–f/2.8) to isolate your subject and blur the background.
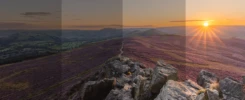
Landscape Photography – Use a narrow aperture (e.g., f/8–f/16) to keep everything sharp from foreground to horizon.
Low-Light Situations – Use a wide aperture to let in more light and avoid using a slow shutter speed.
Group Photos – Use a mid-to-narrow aperture (e.g., f/5.6–f/11) to ensure everyone is in focus.
A Simple Way to Remember
If you’re just starting out, remember this:
- Low f-number = blurry background
- High f-number = sharp background
That single idea will take you a long way.
Final Thoughts
Aperture isn’t just a technical setting—it’s a creative tool. It helps you control not only how bright your image is, but also how your subject stands out in the frame.
The best way to truly understand aperture is to experiment. Try taking the same photo at different f-stops and observe how the image changes. Over time, you’ll develop an instinct for which aperture works best in any situation.
Photography is as much about seeing as it is about settings—and mastering aperture is a big step toward both.